Monday, November 28, 2011

Homemade Creamed Corn Recipe


Canned creamed corn was one of my favorites growing up. However, as an adult canned creamed corn grosses me out. My husband is not a fan either. This Thanksgiving I wanted to see if homemade creamed corn was much better. This creamed corn recipe was really good. I plan on making it at my future holiday dinners and maybe every once in a while through out the year (it has too much fat to have all the time). The original recipe calls for frozen corn but I opted fresh instead. I think frozen corn tends to be mushy and since its already creamed I thought it needed the crunch and sweetness of fresh.


Ingredients:


2 1/2 cups of fresh corn kernels (5 or 6 cobs) or 2 (10 ounce) packages of frozen corn
1 cup heavy whipping cream
1 teaspoon salt
2 tablespoons granulated sugar
1/4 teaspoon freshly ground black pepper
2 tablespoons unsalted butter
1 cup whole milk
2 tablespoons all-purpose flour
1/4 cup freshly grated aged Parmesan cheese, plus more for garnish


Yields 6 servings


Time: 20 minutes prep and 15 minutes cook time.


Directions:

Shuck and clean the corn. Blanch- In a medium to large pot fill 3/4 of the way with water. Bring to a rapid boil. Add a couple pinches of salt and add the corn. 


Return to boil and let boil for 5 minutes. 
Drain corn and shock (place in an ice water bath).


Drain the water. Holding the corn vertically and using a sharp knife, cut the kernels off the cob. Using the backside of the knife, scrape the corn to remove the pulp from the cob. 


In a large skillet or saucepan add the corn, butter, cream, salt, pepper and sugar.  Mix well and heat over medium until butter is melted. In a small bowl whisk together milk and flour. Add to the corn mixture. 


Let simmer until sauce is thickened and corn is soften to desired texture. Remove from heat and stir in Parmesan cheese.  Garnish with freshly grated Parmesan cheese and serve immediately. 


I have made this recipe twice. The first time I thought it would be really good to add a lot of Parmesan cheese to the top and bake in the oven to melt. I did not like this version at all. It was way too cheesy and overwhelmed the dish. The second time I just garnished the corn with a little bit of the Parmesan cheese. Both my husband and I thought this was the best tasting way. 

Saturday, November 26, 2011

Homemade Cranberry Sauce (with Pineapple)


You can whip this quick and easy sauce up in a matter of minutes. It tastes great and is better for you because it's made of fresh fruit. You can skip adding the crushed pineapple at the end and serve the traditional sauce. However, you should give the pineapple a try if you have never had it. It adds texture and the sweetness of the pineapple cuts the sourness of the cranberry. It becomes more palatable for kids and people that are not normally fans of the traditional sauce. 


Ingredients:


1 (12 ounces) package of fresh cranberries, rinsed well
1 cup granulated sugar
1 cup water
* Optional- 1 can (20 ounces) crushed pineapple, drained well


Yields 2 cups (with no pineapple) and 3 cups (with pineapple)


Time: 5 minutes prep and 10 minutes cook time.


Directions:


In a medium saucepan add water and sugar. Bring to a boil until sugar is completely dissolved. 


Add cranberries and return to boil. 


Let boil for 10 minutes.


Place in an airtight container and let cool on counter to room temperature. 
Or add the crushed pineapple (drained) and stir in well. 

Serve or store in the refrigerator. You can also freeze any extra and serve at your next holiday!


Wednesday, November 23, 2011

Almond Stuffed Bacon Wrapped Dates


If you haven't yet tried a bacon wrapped date, I highly recommend that you do. I am not the biggest fan of dates but they pair very well with the crispy bacon. They are easy to make and are not very well known yet so it can be a nice change of pace. The flavor combination reminds me of having pancakes and bacon with maple syrup. When selecting your bacon avoid really thick cuts and maple flavored bacon (its already sweet enough). When selecting the dates try to use small and medium sized ones. The large dates throw off the balance  by making it too sweet. When you bite into them, the bacon should be crisp and salty and the date should be moist. The almond in the center gives it an extra crunch, which is very much needed. You can also stuff the dates with blue cheese, goat cheese, and other types of nuts. The recipe below is my favorite combo. 


Ingredients:


1 package of smoked bacon
1 package (30-35 count) dates, pitted
whole almonds, unsalted (30-35)
Toothpicks


Yields small appetizer for about 6-8 people


Time: 20 minutes prep and 30 minutes cook time.


Directions:

Preheat oven to 375 degrees F. Stuff the dates with one almond each. This should be easy since there is a hole where the dates have been pitted. 

Place stuffed date on strip of bacon and wrap until covered. Cut with scissors or knife 
  • Try to minimize overlap because it will cause that section to be less cooked then the rest of the bacon. 
  • Expect to have left over pieces of bacon.  
  • Keep bacon in refrigerator until you need to use it. Warm bacon is hard to cut and handle. 


Using a toothpick pierce the date to keep bacon securely attached.
Make sure to avoid the almond when inserting toothpick.


On a foil lined baking pan, bake in preheated oven for about 15-2o minutes or until bacon looks crispy and dark. 
You don't want the bacon to be under cooked because this appetizer really needs that extra crunch.

 Check to see how well the underside of the dates are cooked. 
If desired, turn and cook for an additional 10 minutes or so. Make sure to keep an eye on them because they can burn quickly. 

Place dates on paper towel lined plate and let cool for about 10 minutes before serving. 

This last batch that I made ended up not being very salty at all. This is a huge problem because the salt is needed to balance the sweet of the date. I think the problem was the brand of bacon that I used. My husband had the great idea of making a salt water solution and lightly spraying the dates with it. The water evaporated and left the dates with the right amount of salt. It worked like a charm and saved the day! 

Tuesday, November 22, 2011

Super Simple Turkey Brine

I am not a turkey roasting expert but have made several in my life. The biggest thing that I have learned to make a moist, delicious turkey is to use a brine. You can use the brine as the main seasoning, or use a simple one and flavor your turkey in another way. This year we decided to make a maple and bacon flavored turkey so we used a simple brine, we didn't want too many conflicting flavors. If you want to make a fancy brine there are many good recipes online.


Ingredients:


1 (12-15 pound) turkey, defrosted or fresh
1 gallon of water
1 cup of sea salt
1 cup of sugar
Ice
Several tablespoons dried sage


* You can also add lots of your favorite fresh or dried herbs to  spice up this simple recipe.


Yields brine enough for one turkey.


Time: 1-2 hour prep and 12-15 hours soaking time (1 hour for every pound of turkey)


Directions:


Make sure your turkey is fully defrosted. This can take a couple days in the refrigerator so plan accordingly. 

In a large pot bring water to a boil. Add sugar and salt and let dissolve. Remove from heat. Let brine cool to room temperature. Add herbs. 

Remove neck and gizzards from the inside of your turkey. Rinse well and pat dry. 

In a large, sturdy container (I used a garbage bag) place turkey. Pour in brine mixture and add several cups of ice. Make sure all parts of the turkey are covered with mixture. Cover (or in my case, tie bag) and place in refrigerator.
 Refrigerate 1 hour for every pound of turkey. 
Do not let brine longer as it will produce a very salty bird. 

When the turkey is brined for the directed amount of time rinse very well and pat dry.

Prepare and cook turkey as desired. Be careful with cooking times because a brined bird is supposed to cook more quickly than a non-brined bird.

Enjoy!!!   

Maple Roasted & Bacon Wrapped Turkey w/ Cornbread Stuffing


Wanna mix things up from the traditional turkey you prepare every year? This recipe is from Tyler Florence, my favorite chef. I have tried dozens of his recipes and have LOVED every single one, this one was no exception. The meat was very moist and juicy. The outside was sweet and savory. The cornbread stuffing was to die for and the pan drippings made an incredible gravy. It was such a hit that there were no left-overs! :( I will make this again for sure, although I plan on making a couple small adjustments which will be noted in the directions section. 


Ingredients:


1 12-15 lbs brined turkey (recipe available on this blog) 
1 cup unsalted butter, at room temperature
1/2 bunch fresh sage, leaves finely chopped
kosher salt and freshly ground black pepper
2 large onions, finely chopped
1 loaf cornbread, cubed (about 6 cups)
1 large egg, lightly beaten
1/2 cup heavy cream
3 cups chicken stock
1 cup pure maple syrup
1/4 cup hot water
8 strips smoked bacon
1/4 cup all-purpose flour
1/2 lemon, juiced


Yields about 12-15 (1 pound) servings of turkey


Time: 1 hour prep and 3 hours cook time.


Directions:


Preheat oven to 350 degrees F and remove top oven rack. 
In mixing bowl mash butter and sage together well until butter has green flecks in it. 
Season with salt and pepper. 

In a saute pan melt 4 tablespoons of sage butter, add onions and cook until soft and golden, about 15 minutes. Remove from heat.


In a medium mixing bowl combine cornbread, sauteed onions mixture, heavy cream,  egg and just enough chicken stock to moisten but not make soggy (about 1/2 cup).
 Mix well and season with salt and pepper. 

Generously sprinkle salt and pepper on outside of turkey. Using your fingers, gently lift skin from breast and legs of turkey. 


Place sage butter under skin and massage. Fill the bird with the stuffing, not packing it too tightly. Place the remaining stuffing in a buttered baking dish. 
(When turkey is done in the oven bake the stuffing at 350 degrees F for about 15 minutes).


Place turkey on baking rack on roasting pan and put into oven.


Mix maple syrup and hot water in small mixing bowl or saucepan. Use this to baste the turkey every 30 minutes. (Don't be tempted to make more glaze to baste, this will cause the pan drippings too sweet, thus making the gravy too sweet). 


After about 2 hours of cooking take the bird out of the oven and place the bacon on top, slightly overlapping. 

  • The turkey is supposed to take about 3 hours to cook. I used a convection oven and it only took 2 hours.
  •  A brined turkey is supposed to cook more quickly than a non-brined bird as well.
  •  If the bird starts getting too brown, place foil on top. 

The turkey is done when an instant read thermometer reads 170 degrees at the meatiest part of the bird AND the juices in the thigh pieces run clear. 


Place turkey on a cutting board and let rest for 20 minutes before carving. 

To make the gravy: Skim off the excess fat from the pan drippings with a spoon and place the roasting pan over 2 burners set on medium-high heat. 


Whisk the flour into the drippings, whisking constantly to avoid lumps. Slowly add chicken stock until it becomes a little thinner than the consistency you desire. Season with salt and pepper and add the lemon juice (to brighten the flavor). Let simmer for 5 minutes. Strain to remove any particles, if desired. 


Watergate Fruit Salad


This yummy fruit salad certainly tastes better than it looks. It isn't a dish that I normally would make because the ingredients are processed and there really isn't much fruit in it, but it tastes so good!! My aunt Cindy made it last year at Christmas and it was delicious. It is also very easy to make and only requires a few ingredients. It tastes better  when it sits in the fridge for a few hours, so you can make it well in advance.


Ingredients:


1 can (20 ounces) of crushed pineapple, undrained
1 cup miniture marshmallows
1 1/2 cup cool whip, thawed
1 package (4 1/2 serving size) of Jell-O brand pistachio pudding mix
1/2 cup chopped pecans


Yields (8) 1/2 cup servings


Time: 5 minutes prep and 1 hour (at least) refrigeration time.


Directions:


Mix all ingredients except cool whip in a large bowl.


Gently fold in cool whip until just blended.


Cover with foil or plastic wrap and refrigerate for at least 1 hour before serving. This allows the marshmallows to soften and the flavors to blend.

Friday, November 11, 2011

Baking 101- 3 Tips to Becoming a Better Baker


I have been reading this great baking book that was given to me last year for my birthday from my foodie friend, Ashley. It is from Sur La Table, and it's called The Art & Soul of Baking by Cindy Mushet. The reason I love it so much is because it has complex recipes that are geared for the baking novice. It explains every step in detail and has lots of pictures. Baking is a science and anyone that has made bakery goods from scratch knows that one mistake can ruin the entire thing. It can be so discouraging and frustrating to work on something for hours and have it turn out badly (especially if you don't know why). This book has some simple steps that you can implement before you begin baking, that will make you a better baker. 


Step 1- Organize your work area
Keeping all your baking equipment and ingredients in an organized and efficient manner not only saves you time, but can make your food taste better. 
Here are some tips...
  • Keep your flour and sugar in airtight containers on the counter where you mix and measure your ingredients.
  • Keep obscure ingredients tucked away, together, in sturdy airtight containers (away from heat sources). 
  • Keep all baking tools together so you don't have to run around looking from them every time you bake. 
  • Don't use baking utensils for regular cooking because many baking ingredients such as butter, eggs, cream and chocolate can easily absorb flavors. 


    Step 2 -Make sure your oven is accurate
    Most people assume that they have an accurate oven but in reality, they can vary 25 to 50 degrees F, sometimes up to 100 degrees F. Even if you are doing everything exactly as the recipe calls for, if the oven temp is off, your hard work can be for nothing. The best thing to do is buy an alcohol based thermometer and test your oven. 


    To test your oven: 
    Adjust an oven rack to the center position and set your thermometer in the center of the rack. Set oven to 350 degrees F. Let the oven heat for 20 to 30 minutes. Check the temperature on the thermometer.  If your oven is off, make a note of it and adjust cooking temperature for all subsequent baking ventures. 


    Step 3- Make sure you all measure ingredients accurately 
    Aside from your oven temperature, nothing can influence the outcome of your baking more than measuring. Baking is chemistry and chemistry depends on ratios. Once ingredients are mixed and poured into a pan, there is often no way to fix any mistakes.  There are two ways you can measure; by volume and by weight.


    Measuring by volume: Liquids
    Liquid measuring cups are either glass or plastic and have a pour spout. They usually have plenty of room above the highest measurement  to avoid spilling. The reason it is important to use a liquid measuring cup to measure your liquids instead of dry measuring cups is because of the meniscus. You may have heard this word in a science class you have taken. It's a curved surface line occurs when you measure liquids. If you use dry measuring cups, the liquid would overflow, leaving less than the recipe calls for. To properly measure liquids, place the liquid measuring cup on an even surface, pour in the liquid, and lean over to check the accuracy at eye level. 


    Measuring by volume: Flour and other dry ingredients
    Dry measuring cups are usually plastic or metal. To properly measure dry ingredients it is important to watch the wording used in your recipes. Look for words like sifted, packed, loosely, dip & sweep and lightly spooned. The order in which these words appear is also important. Here is an example;


    1 cup flour, sifted
    1 cup sifted flour


    The first line refers to the flour being scooped into a cup and leveled flush with the rim, then sifted after it is measured. The resulting weight is 5 ounces. The second lines refers to sifting before measuring, which results in a weight of 3 3/4 ounces per cup. 


    To measure a sifted ingredient, place measuring cup on a piece of parchment paper and sift flour until it fills the cup and is slightly mounded over the rim. Use a knife to scrape off the excess until the cup is level. 
    To measure by lightly spooning and leveling, spoon the flour into a cup, mounding and leveling as described above.
    To measure by dip and sweep, first loosen the flour by gently stirring it. Dip the measuring cup in and use the same mounding and leveling described above. 


    If the recipe doesn't indicate which method to use, use the dip and sweep method (unless the recipe is older than 1960's, in which case, assume it should be sifted).


    Measuring by weight
    Measuring by weight is highly recommended in baking. The Cindy Mushet suggests that it is the single most important thing you can do to become a better baker. The reason it is highly recommended is because it eliminate any inaccuracies. Professional bakers always weigh their ingredients, both for precision and to ensure consistency (and because they are making huge portions). A digital scale is recommended. If you plan on doing some serious baking, you should invest in one. 


    Other ways to become a better baker are to know your baking equipment and your ingredients. I will post detailed information about this over the next few weeks
     (there is a lot to research!).

    Thursday, November 10, 2011

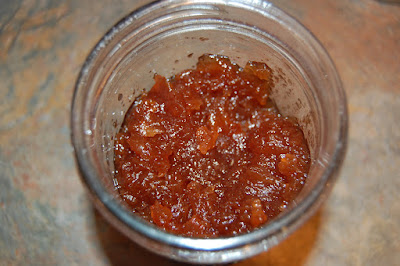
    Apple Butter Recipe


    We ran out of jam once again! I went to the store to buy some strawberries to make more but they were out. This inspired me to make jam out of apples, which are in season right now. Apple Butter is just apple jam. You can use it on toast, on pork or mix it in your oatmeal (yummy). It takes a really, really long time to make but it is fairly easy. If you have a food processor it is super easy. The most labor intensive part of making this recipe is washing, peeling, coring and finely chopping the apples. Once that part is done, all you have to do is mix in the spices and sugar and let it cook. I ended up cooking mine for a very long time, about 20 hours. I have a new slow cooker and I find that it takes longer than most recipes call for. Hopefully yours cooks in the normal time (14 hours). Even if it does take almost 2 days, its very low maintenance. I thought that it might be done before I went to bed but I was really tired and didn't want to wait. So I added some water, turned it down and put the cover back on. When I woke up it looked exactly like it did before I went to bed.  


    Plan ahead, this can take up to 2 days to finish cooking. 
    You need a slow cooker for this recipe. 


    Ingredients:


    8 large apples, about 5 1/2 lbs (I used honey crisp because they are my favorite)
    2 1/2 cups granulated sugar (adjust level according to how sweet your apples are)
    2 teaspoons ground cinnamon
    1/2 teaspoon ground cloves (or you can use ground allspice if you prefer)
    1/4 teaspoon of salt


    Yields 32 ounces 


    Time: 30 minutes prep and 14 hours cook time.


    Directions:


    Wash, peel, core and finely chop apples (the finer the apples are chopped, the smoother the jam). Put apples in slow cooker and mix with spices and sugar. 


    I got lazy... so my apples aren't that finely chopped :)
    Cover and cook on high for 2 hours.

    Turn to down medium (low setting if you only have 2 settings) and continue to cook for 10 hours (longer if using low setting). Apples should be a dark brown. Remove cover and continue to cook for 1-2 hours until it reaches the consistency you want. 

    I took half the mixture out because it was the consistency of apple sauce and let the rest cook down for an additional hour until it was thick enough for jam. I plan on mixing the thinner version in my oatmeal and serving it with pork dishes.


    And the thicker mixture for toast and scones. 


    Let cool completely and store in the refrigerator for up to two weeks. 

    Tuesday, November 8, 2011

    Homemade Ranch Dressing Recipe


    My son loves to eat ranch dressing with his veggies. In fact, that is the only way I can get him to eat any at all. A couple days ago we ran out of our Hidden Valley ranch. Since I am trying to feed my family as much homemade food from scratch as possible, I decided to try making it myself. I was surprised how simple to was to make. If you have a large variety of spices in your cupboard, you can probably make it without going to the store. It's not going to last as long as the store bought stuff because its lacking all the preservatives, but that's a good thing. And if you were wondering... my son loved it. He kept saying "mmm", every time he bit into a ranch covered carrot stick! If you know of any other outstanding ranch recipes, please share them with me!!

    The recipe I used is thick for veggie dipping but you could also substitute buttermilk to make it thinner for salads. Just use 1/2 cup buttermilk, 1/2 cup sour cream, and 1/2 mayo instead of what is listed below.

    Ingredients:

    1 cup reduced-fat olive oil mayonnaise (any mayo will do)
    1/2 cup reduced-fat all natural sour cream (any sour cream will do too)
    1/2 teaspoon dried chives
    1/2 teaspoon dried parsley
    1/2 teaspoon dried dill weed
    1/4 teaspoon garlic powder
    1/4 teaspoon onion powder
    1/8 teaspoon salt
    1/8 teaspoon freshly ground black pepper
    Yields 1 1/2 cup of ranch

    Time: 35 minutes prep time

    Directions:

    Whisk all ingredients in a small bowl. Cover and refrigerate for at least 30 minutes.


    Cover and refrigerate leftovers for up to two weeks.

    Friday, November 4, 2011

    Apple-Cranberry Oatmeal Recipe


    If you are looking for a new way to have your oatmeal in the morning, try this out. It doesn't take much time and it is a nice change to the same ol' thing. 

    Ingredients:


    1 cup old fashioned oats
    1 3/4 cups water
    Pinch of salt
    1/4 cup dried cranberries
    2 tablespoons chopped pecans
    1 large apple
    1/2 tablespoon lemon juice
    1 tablespoon granulated sugar
    1/4 teaspoon ground cinnamon


    Toppings suggestions to mix with oatmeal:


    Milk
    Brown sugar
    cinnamon
    vanilla extract


    Yields 2 servings


    Time: 15 minutes prep and 15 minutes cook time.


    Directions:


    Preheat oven to 350 degrees F. Toast pecans for about 7 minutes. 
     Make sure they don't burn because they will taste awful. 

    Peel, core and slice apple. In a small bowl combine apple slices, lemon juice, sugar and cinnamon. 
    Taste a piece of apple and adjust sugar, lemon and cinnamon levels, if desired. 

    In a small saute pan melt butter over medium-high heat. Add apples. Let cook for about 5 minutes, stirring occasionally. 
    Apples should be tender but not mushy.

    Place water, salt and cranberries in a small saucepan and bring to a boil. Add oats and reduce heat to medium. Let cook for about 5 minutes, stirring occasionally. You'll know its done when the cranberries and oats are soft and the water is absorbed. 

    Pour oatmeal into two separate serving bowls. Add desired toppings (I used 1 tablespoon of milk and 1 tablespoon of sugar in each bowl) to oatmeal, mix well.  
    Divide cooked apples and top oatmeal equally. Garnish with toasted pecans. 

    Thursday, November 3, 2011

    Baked Ham & Cheese Sandwiches (Ham Babies)


    I first tried these delicious little sandwiches at my friend Ashley's house. She is the biggest foodie I know and a great cook. I was surprised how addictive they were. If you are looking for an different appetizer that will impress your friends and be a huge crowd pleaser, give this one a try. What makes it so good are sweetness of the Hawiian rolls, the saltiness of the ham and the creaminess of the butter and cheese. I bet that they will quickly become one of your "go to" recipes. There are many different recipes out there for these sandwiches. I have tried a couple but this recipe is the best by far. 


    Ingredients:


    12 King's Hawaiian rolls
    12 thin slices of ham (I like to get it fresh from the deli, I recommend Black Forest)
    12 thin slices of cheddar cheese (sharp Cheddar is really yummy)


    For poppy seed sauce:


    3/4 stick of unsalted butter, melted
    1/2 tablespoon Worcestershire sauce
    2 tablespoons brown sugar
    1/2 tablespoon yellow mustard 
    1/2 tablespoon poppy seeds


    Yields 12 sandwiches


    Time: 15 minutes prep and 25 minutes cook time.


    Directions:

    Melt butter in small saucepan (or microwave in small bowl, about 45 seconds), mix in all other ingredients.


     Brush the bottom of a 9x13 baking pan with some of the butter mixture.


    Cut the entire package of rolls horizontally and lightly brush the bottom of each roll with some of the butter mixture. 


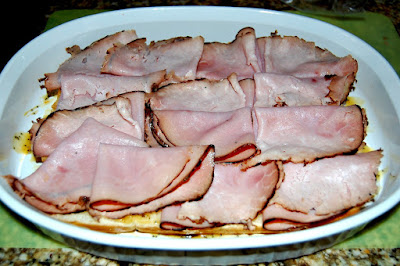
    Place thin layer of ham...


    and cheese on the bottom half of each roll. 


    (These slices are a little thick)
    Top with the top half of roll. Brush tops of sandwiches with the remaining butter mixture. Let some of the mixture drip over the sides.


    Preheat oven to 350 degrees F. Cover tightly with foil and bake for about 25 minutes.