Showing posts with label How to Make. Show all posts

Wednesday, December 7, 2011

How To Make Your Berries Last Longer!


This tip is from my friend Rutie's blog at http://spiceoflifeasawife.blogspot.com/. I haven't tried it yet but I am very excited to. There is nothing I hate more than to buy expensive berries and have them become moldy by the next day. If you try this, let me know how it works for you!

It's super easy to do...

Mix 1 part vinegar (apple cider is recommended) to 10 parts water. Rinse berries with the mixture to kill bacteria and spores!

Tuesday, November 22, 2011

Super Simple Turkey Brine

I am not a turkey roasting expert but have made several in my life. The biggest thing that I have learned to make a moist, delicious turkey is to use a brine. You can use the brine as the main seasoning, or use a simple one and flavor your turkey in another way. This year we decided to make a maple and bacon flavored turkey so we used a simple brine, we didn't want too many conflicting flavors. If you want to make a fancy brine there are many good recipes online.


Ingredients:


1 (12-15 pound) turkey, defrosted or fresh
1 gallon of water
1 cup of sea salt
1 cup of sugar
Ice
Several tablespoons dried sage


* You can also add lots of your favorite fresh or dried herbs to  spice up this simple recipe.


Yields brine enough for one turkey.


Time: 1-2 hour prep and 12-15 hours soaking time (1 hour for every pound of turkey)


Directions:


Make sure your turkey is fully defrosted. This can take a couple days in the refrigerator so plan accordingly. 

In a large pot bring water to a boil. Add sugar and salt and let dissolve. Remove from heat. Let brine cool to room temperature. Add herbs. 

Remove neck and gizzards from the inside of your turkey. Rinse well and pat dry. 

In a large, sturdy container (I used a garbage bag) place turkey. Pour in brine mixture and add several cups of ice. Make sure all parts of the turkey are covered with mixture. Cover (or in my case, tie bag) and place in refrigerator.
 Refrigerate 1 hour for every pound of turkey. 
Do not let brine longer as it will produce a very salty bird. 

When the turkey is brined for the directed amount of time rinse very well and pat dry.

Prepare and cook turkey as desired. Be careful with cooking times because a brined bird is supposed to cook more quickly than a non-brined bird.

Enjoy!!!   

Tuesday, October 18, 2011

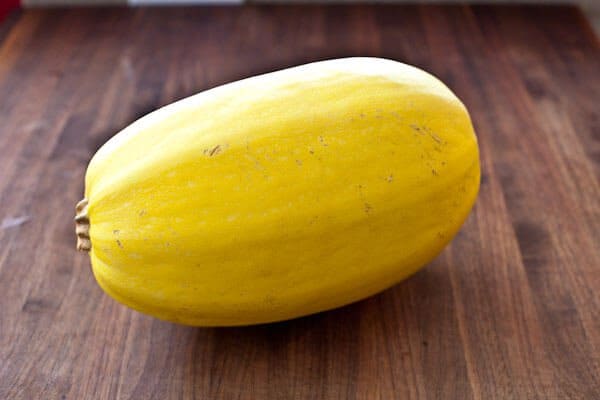
How to Make Spaghetti Squash


My son and I went to the pumpkin patch last weekend. We had so much fun looking at the barn animals, going through the corn maze and picking out our pumpkins. While we were there I came across a large yellow squash. The lady that worked there told me that it was spaghetti squash. I have heard of it before but had no idea how to cook it or what to make out of it. I decided to give it a try. I did some research and found out that its a popular substitute for pasta noddles (hence the name), in pretty much any dish. There are less carbohydrates and more nutrition that traditional noddles as well. It was really easy to make and I felt much better eating squash noodles than regular pasta noodles. 

Ingredients:

1 large spaghetti squash
water

Yields roughly 5-6 servings noodles, depending on size of squash

Time: 1 hour

Recipe:

Preheat oven to 375 degrees F. While the oven is preheating, wash, cut and scrape out squash. To cut, remove the top potion with the stem and then cut lengthwise down. This will be difficult and will require some brute strength. 


Using a large spoon scrape out the insides of the squash, much like you would with a pumpkin. 


Pour about 1/2 of water on cookie sheet and place the squash, rind up on sheet. Bake on middle rack of oven for about 45 minutes.


 To remove noodles, take fork and scrape width wise across the inside of the squash. The squash should be soft but have the texture of al dente noodles. You can scrape till you get close to the rind.


Now that you have these noodles, what to do with them? Like I said, you can replace them for any recipe that calls for pasta noodles. Instead of cooking them in boiling water, simply saute them with olive oil until they are hot and the consistency that you want.

My husband and I made some for dinner the other night. I just threw all the left over ingredients I had in my fridge from the week. This included sauteed onions, mushrooms, and garlic, artichoke hearts, sun dried tomatoes, and garnished with grated fontina cheese and green onions. I didn't want anything to go to waste so I just threw it all in. 


Much to my surprise it turned out really well. My husband brought the leftovers to work for lunch the next day and said it was delicious. My favorite part about it was that I felt good eating it. I didn't feel my usual pasta remorse as I normally do after I scarf down a bowl of fettuccine alfredo. 

Saturday, October 15, 2011

How to Make Butter, Whipped Cream, and Buttermilk By Hand


Today I am planning on making homemade bread and jam, so why not make some homemade butter too? The only thing I really know about making butter is that people used to churn it for a long time back in the day. But can it be done nowadays without a churn? After some investigation I learned that it's easy to do at home. If you have a stand mixer it is really easy. Apparently it only takes 90 seconds to turn cream into butter that way. I don't have a mixer yet so I had to do mine another way. This way is easy but a little labor intensive. I am not going to make all my butter this way because I bake a lot, but I think it will give a meal a special touch when it's an accompaniment or on bread.


Ingredients:


1 cup heavy whipping cream (yields about 1 cup whipped cream, or 1/3 cup of butter and 1/3 cup buttermilk)
1 jar with a tight lid


Time: 15 minutes of shaking


Recipe:


Pour the cream into the jar and seal. 


Shake vigorously. After about 5 minutes you won't hear the liquid move anymore, this is whipped cream (I was too excited to stop and take a picture at this point, but you know what whipped cream looks like anyway :) ). You can add a drop of vanilla and some sugar and serve, or...

Keep shaking...

After another 5 minutes you will see and hear liquid again. This is the buttermilk separating from the butter. Shake for another minute or two to get separate the two well. 


Pour buttermilk into a storage container. 


There will be some buttermilk residue in the jar with the butter. You need to remove this to  increase shelf life.  To do this, make an ice water bath. Pour some of the water (and no ice) into the jar. Seal and shake for about 30 seconds. Dump out the liquid. Repeat until water runs clear. 

Viola! Butter and Buttermilk! I bet you didn't know it was that easy. Seal and refrigerate both.

Things to consider adding to the butter
 (not at the same time):
Sea Salt
Honey
Parsley, Salt and Garlic


Thursday, October 13, 2011

How to Make the Perfect Scrambled Eggs


A while ago I wanted to figure out how to make the kind scrambled eggs that you would get at a nice breakfast place. It wasn't that mine were bad, I just knew I was missing something in my technique. I did some searching and finally figured out how to do it. This method produces eggs that are light, fluffy and moist. The downside is that it takes twice as long to make them. I only do them this way when I am feeling fancy or trying to make a special breakfast for someone. You can add any seasoning you like to your eggs but make sure to add any salt right before pouring the mixture into pan. Give this method a try and let me know what you think.

Ingredients:

2 large eggs
1 tablespoon of milk, you can also use water if you prefer your eggs drier
1 tablespoon of butter
Salt and pepper to taste
garnish pictured: chives and sharp cheddar cheese

Recipe:


The main difference in technique here is vigorous whisking (to incorporate air), low heat, slow cook time and folding the eggs gently. 


If you have time let the eggs warm up to room temperature on the counter.


Use a small non-stick saute pan and rubber spatula. 

Start by putting the butter on a pan and placing on medium LOW heat. While the butter is melting and the pan is heating, whisk eggs and milk vigorously in a separate bowl. Right before adding eggs to pan add salt, stir. Pour eggs into pan. 

When the egg mixture starts forming a film around the edges of pan begin folding eggs inwards. 


Continue folding eggs as they cook, trying to touch them as little as possible.


Take them off heat while they are still moist, as they will continue to cook a bit afterwards.


Season and garnish how ever you like. Enjoy!

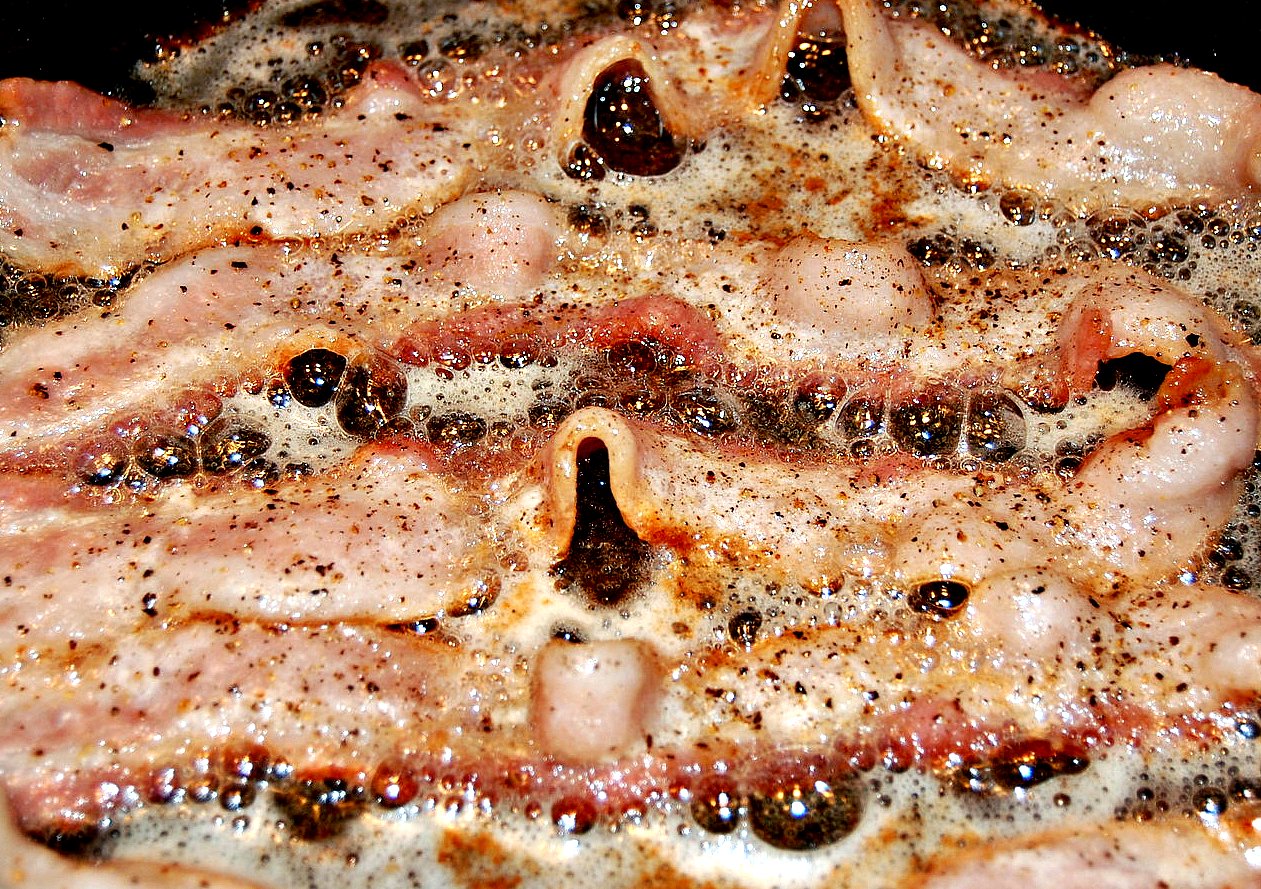
All About Bacon


Who doesn't love bacon? I grew up in a family where we would have bacon 5 times a week. Before school my grandmother would make me bacon and eggs almost everyday. I love it. But as you know, not all bacon is created equal. There is nothing worse then to get your breakfast and have limp, under cooked bacon. And there is nothing better than getting a perfectly cooked crispy piece. It can really make or break your breakfast.  


Here are some tips if you have trouble getting perfectly cooked bacon at home. 


Do not add oil or butter to the skillet. The bacon will produce grease as it cooks.  

Start by placing the bacon in a skillet, turning heat on to medium.


Cook for about 5 minutes or until the bacon begins to brown, then flip.

I added freshly cracked pepper to give it a kick. You should try it, it's amazing!
When the bacon is evenly brown and develops bubbles on top, it's done. (Remember that it will continue to cook a little bit after it's taken off the heat).

Place on paper towel to absorb excess grease.

Here is example of under cooked, perfectly cooked, and over cooked bacon.

The over cooked bacon is on top,  perfectly cooked in the middle and under cooked on the  bottom. 
Disposing the grease: The best way to dispose of the grease is to wait until it cools down a bit and pour into an empty can. You can then wait for it to solidify and throw it away. If you don't have an empty can laying around you can also turn on your hot water, turn on the garbage disposal and dump the grease down your kitchen sink. 

If you ever experience a grease fire DO NOT throw water it it. This will make it worse. The best thing you can do is dump flour or baking soda on it.


How to Make a Good Cup of Hot Tea

I am some what of an expert in making hot tea. I was raised by my English grandmother who made hot tea no less than 4 times a day. I was shocked to find that making a good cup of hot tea is not common knowledge. My husband and friends have made me tea that is watery and tasteless. The biggest thing that they were missing was steep time. Steeping refers to the amount of time you let the tea bag sit in the hot water. It's not enough to put the bag in and serve. In order to make a good tasting cup you have to let it steep for at least 3 to 5 minutes. It is also a good idea not to fill your cup up full with the hot water. A tea bag is intended for 6 to 8 ounces of water and the average coffee mug holds 12 ounces. 


Right after adding the tea bag...


After 30 seconds...


After 3 minutes...


After 5 minutes...


Obviously you can see that letting the tea bag sit for the full 5 minutes gets the tea nice to a dark amber color. The flavor is stronger and it makes a much better cup of tea.

Monday, October 10, 2011

Vanilla Sugar Recipe


I thought it would be fun to try to make Creme Brulee. I started looking up recipes and found out that vanilla sugar is a required ingredient. I had never heard of this before so I did some research. People rave about how great it is in coffee and in baking. Its supposed to make a great gift. It's simply granulated sugar and the insides of a vanilla bean. 

Plan ahead because it takes 2-3 weeks in an air tight container before it is ready!

Ingredients:


2 cups granulated sugar
1 vanilla bean


Recipe:


Open the vanilla bean with the backside of a knife. Scrape out the inside and mix with 1/2 cup sugar. If the vanilla bean is fresh use the back of a large spoon to work the vanilla and sugar together as evenly as possible. 


 Put the sugar mixture and the scraped out vanilla bean in your container.

Add the remaining 1 1/2 cups of sugar to the container, seal and shake until mixed well. 


Let vanilla infuse in sugar for 2-3 weeks, then enjoy on anything you want.

Recipe for Making Buttermilk Substitute from Regular Milk

Yesterday I got a craving for buttermilk pancakes. I have a really great recipe but was out of buttermilk. Since I didn't want to go to the store for just that I did some investigating online. I found out that there is a simple way to make buttermilk substitute from regular milk and white vinegar (or lemon juice).

The recipe is:

1 cup milk (I recommend 2% or higher fat content)
1 tablespoon white vinegar or lemon juice


All you have to do is mix the milk and vinegar and wait 5 minutes and viola! Buttermilk substitute! It wasn't as thick or as chunky as regular buttermilk and had a stronger smell but the pancakes tasted great!