Friday, January 13, 2012

Fat-Free Black Beans


Black beans are so good for you. They are high in fiber, protein and iron. Oh course all beans are tasty with oil or lard but they don't have to be. You can make tasty beans with no fat at all. They do take a very long time to cook from their dried state but they are worth it.

Ingredients:
16 ounce bag of dried black beans
8 cups of water (more as needed)
1 medium onion, cut in half
3 garlic cloves, minced
2 1/2 teaspoons kosher salt
1/2 teaspoon garlic powder
1/2 teaspoon onion powder
1/2 teaspoon fresh ground black pepper
1/2 teaspoon Chile powder
1/4 teaspoon cumin
1 bay leaf

Yields 6-8 side dish portions
Time: 5 minute prep and 3 hours cook time.

Directions:

Soak dried beans in water overnight or do a quick soak. Do do a quick soak add beans and 6 cups of water into a large pot. Bring to a boil, cover for 1 hour.

To cook bean: In large pot add all ingredients. Bring to a boil. Reduce heat to simmer and cook uncovered for several hours, stirring occasionally. Add more water as needed. 

Beans are done when they are soft and break apart easily. Continue to cook down until water has evaporated, leaving a little bit in the pot (pictured below).


Remove bay leaf. 
You can leave the beans as is or use a potato masher to make them a refried bean consistency. Add more water when mashing, if needed.

Thursday, January 12, 2012

Cilantro Lime Rice


I made this rice to change things up a bit. It's low-fat and easy to make. My husband loved it. I wasn't the biggest fan though. To me, it was too plain. I am sharing the recipe anyway because my husband love it so much. I bet if you are looking for a "lighter" side, you will love it too. 

Ingredients:

1 tablespoon olive oil
1 cup long-grain white rice
2 cups water
1 teaspoon lime zest
2 tablespoons fresh lime juice
1/2 cup cilantro, chopped
Salt, to taste

Yields 6 side dish servings
Time: 5 minute prep and 25 minute cook time

Directions:

In a medium skillet heat oil over medium high heat. Add rice and saute until rice is a pale golden color. Add water and stir. Turn heat to simmer and cover. Cook for 20-25 minutes or until rice is fluffy and soft.

Before serving add lime juice, zest, cilantro and salt to taste. 


Tuesday, January 10, 2012

Chicken Tortilla Soup


This is a great recipe that I got off the website skinnytaste.com. The website was recommended to me by my friend Jemma. Thanks Jemma! I usually don't like low-fat dishes but this one was filled with flavor. I also added freshly fried tortilla strips and fresh avocado. It is very filling and can be served as a meal or as a starter (much smaller portion). I ended up adding 3 tsps of chipotle pepper to give it an extra kick. If you want a guilt-free and delicious soup to try, this is it!


Ingredients:


2 teaspoons olive oil
1/2 cup onion, chopped
3 cloves garlic, minced
3 cups low sodium fat-free chicken broth
8 ounce can tomato sauce
2 teaspoon chipotle chile in adobo sauce (more or less to taste)
1/2 cup chopped cilantro (plus more for garnish)
15 ounce can black beans, rinsed and drained
2 cups frozen corn
14.5 ounce can petite diced tomatoes
1 teaspoon cumin
1/2 teaspoon dried oregano
2 8 ounce skinless chicken breasts 
1/4 cup chopped scallions, for topping
3/4 cup shredded reduced fat cheddar cheese
sour cream, for topping (optional)
sliced avocado, for topping (optional)
tortilla strips, for topping (optional)


Yields 6 meal sized servings


Time: 10 minutes prep and 4-6 hours cook time (crock-pot)


Directions:


Heat oil in a saucepan over medium-low heat. Add onion and saute until soft, about 3 minutes. Add garlic and saute for 30 seconds.


 Add chicken broth, tomato sauce, and chipotle adobo sauce and bring to a boil. 


Add cilantro and remove from heat.


To crock-pot add beans, tomatoes, corn, cumin, oregano and stir. 


Pour in chicken broth mixture. Add chicken. Cover and cook on low heat for 4-6 hours. 


Remove chicken and shred with two forks. Add chicken back into soup. 


Adjust salt and cumin levels to taste. 

Serve with low-fat sour cream, cheese, scallions and cilantro. You can also add avocado and tortilla strips. Yummy!


Thursday, January 5, 2012

Chicken Fajitas


My husband has taken a stand against the fattening comfort food I have been cooking for the past few months. Since its the beginning of the year he has asked me (begged me) to start cooking lower fat dishes. This week I decided to make some Mexican dishes. I make the main components low-fat for him and I can still add as much cheese and sour cream to it as I want. It's really a win-win.

Ingredients:

Fajita marinade (recipe available on this blog)
2 lbs of chicken breast
1-2 bell peppers, sliced into strips
1 large yellow onion, thinly sliced
corn tortillas
sour cream, for garnish
shredded cheese, for garnish
chopped cilantro, for garnish
chopped scallions, for garnish
diced tomatoes, for garnish

Directions:

Heat cast iron grill pan over medium high heat (or a large skillet if you don't have a grill pan). When pan is hot add marinaded chicken (reserve marinade for cooking the veggies). 


Cook chicken 5-6 minutes on each side or until done. Remove from pan and allow to rest on cutting board for several minutes.


Slice into thin strips. 


If using a regular skillet use the same pan to cook the veggies that you cooked the chicken with. If you used a grill pan, use another skillet to cook the veggies. 

Heat pan over medium and add leftover marinade. 


Add sliced peppers and onions. Cook until limp. 


Serve on corn tortillas and garnish with whatever you like. :)


Fajita Marinade


I made chicken fajitas for my husband a couple days ago. The recipe I used was an adaption from Tyler Florance. I changed a couple things because I didn't have everything the recipe called for. The chicken turned out really well. It was very moist and juicy. I really liked the citrus notes and the garlic. I recommend adding some chile powder to spice it up a bit. 

Ingredients:

1/4 cup canola oil
2 teaspoons Worcestershire sauce
1 teaspoon salt
1/2 teaspoon ground black pepper
1/2 teaspoon ground cumin
1/2 teaspoon dried oregano
3 cloves garlic, minced
1 lime, juiced
1 small orange, juiced
1/3 cup cilantro, chopped 
2-3 lbs meat of your choice
Directions:

Add all ingredients (except cilantro) into small bowl and whisk together. Stir in cilantro.


Pour marinade into a shallow pan or zip lock bag add meat. Seal and let marinade for 8 hours. If your meat is not covered completely be sure to shake the bag or turn the chicken in the pan halfway through.

Cook and enjoy.


Saturday, December 31, 2011

Crunchy Peanut Butter and S'mores Cookie Bites


A couple years ago I participated in a cookie exchange. I really wanted to make a cookie that no one had ever had before. After doing a lot of investigating I came across a great recipe. The only trouble was that it took hours to put the cookies together. They were such a hit but I didn't want to go through all that trouble making them again. This year I decided to try the cookie recipe as a bar. They still tasted great and it took a so much less time and effort to make. The original recipe is worth a try if you have the ambition to really impress your friends and family with something different. I will put that recipe at the bottom of this post if you are interested in trying it out. 


Sorry the pictures on this post are so bad. My camera stopped working so I took these pics with my cell phone.


Ingredients:


1 cup crunchy peanut butter
3/4 stick of butter
2 1/2 cups powdered sugar
1 1/2 cups puffed rice cereal 
12 ounces semisweet chocolate chips, melted
1 cup graham cracker crumbs
3/4 cup coconut flakes
1/2 to 1 cup marshmallow fluff


Yields around 2 dozen bites


Time: 30 minutes prep time and 5 minutes cooking time (in microwave)


Directions:


Pour chocolate chips in small microwave bowl. Microwave for 1 minute and 30 seconds on 50% reduced power. Stir and microwave in 20 second increments until chocolate is melted completely. 


Line a 9x13 inch baking pan with parchment paper. Pour melted chocolate on paper and spread an even layer across bottom of pan. 


I would recommend skipping this next step because it stopped the chocolate from sticking to the rest of the bar and it kept falling off. 

But here it is if you were curious... Mix the graham cracker crumbs and coconut together. Evenly spread half the mixture across the chocolate.


In a small microwave bowl melt butter and peanut butter. Mix well.


Pour powdered sugar in medium bowl. Add melted peanut butter and butter mixture to the powdered sugar and mix well. 


Fold in puffed rice cereal.


Place dollops of mixture on top of the chocolate mixture in pan. Refrigerate for 30 minutes.


Remove from fridge and gently spread topping into a smooth, even layer.


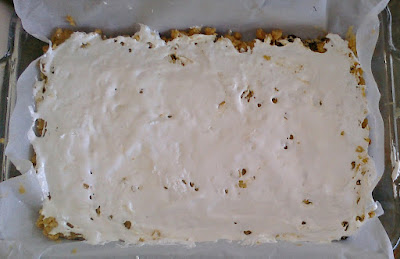
Spread marshmallow fluff in a smooth, even layer.


Spread the remaining graham cracker crumb/ coconut mixture on top of the fluff. If you skip the step that I recommend you will have plenty of this mixture, if you don't, you might want to make more to cover the top completely.


Cover and refrigerate for 2 hours before serving.  To cut easily, pour hot water in a coffee mug. Place a sharp knife in the hot water and cut one section at a time. Replace knife when it becomes sticky. 

It's best to cut small bites because this dessert is very rich. It is also recommended to not leave it out on the counter too long because the marshmallow fluff will melt and make a sticky mess (pictured below).


To make the fancy cookie version of this bar double all ingredients. This makes 4 dozen cookies and takes about 2 hours of assembly time and 3 hours of refrigerating time. 

  • In a large bowl add peanut butter, butter and powdered sugar. Mix with electric mixer until smooth. Fold in rice cereal. Using a teaspoon scoop mixture into balls, then press into the shape of a quarter. Refrigerate for 30 minutes. 
  • To make bites, dip cookies into melted chocolate then toss in the graham cracker crumbs/coconut mixture until coated. Double coat each peanut butter coin. Arrange on wire racks and refrigerate for 30 minutes.
  • Add marshmallow fluff to pastry bag. Add dollops of fluff to one cookie and sandwich with another until all cookies are assembles. Refrigerate for 1 hour. 


Friday, December 30, 2011

Sugar Cookie Recipe


This post is a little late since Christmas is over but I thought I would share it anyway. This was my first attempt at making sugar cookies and it was a bit more difficult than I thought it would be. I was happy when they turned out well. The dough was dry and cracked, making it hard to roll out. After they baked they looked like normal. They were buttery, crunchy and only slightly sweet. They tasted great after we frosted them up. I liked them so much that I ate the majority of them before I took a picture of them. That's why only two are pictured after we frosted them. :)

Ingredients:

2 & 1/4 cups of unbleached all-purpose flour
3/4 cup plus 2 tablespoons sugar
1/4 teaspoon salt
2 sticks (1 cup) unsalted butter, cold and cut into 1/2 inch pieces
2 large egg yolks
2 teaspoons pure vanilla extract

Yields about 2 dozen cookies

Time: 45 minutes prep (which includes 30 minutes of chilling) and 20 minutes cook time.

Directions:

Place 3/4 cup of the sugar, flour and salt in a bowl. Mix with hand mixer to blend ingredients.


Add butter and mix on low until butter is broken in tiny pieces, about 2 to 3 minutes.


 Turn mixer on medium and mix until small clumps are about the size of peas, about 2 to 3 minutes. 


In a small bowl whisk together egg yolks and vanilla.


Add egg mixture to the butter mixture and blend on medium-low until dough comes together in large clumps. Using your hands knead dough until it comes completely together. Divide dough into half. 


Form dough into disks and cover tightly in plastic wrap. Refrigerate for at least 30 minutes.
You can chill in the refrigerator for up to 3 days and freeze for up to 2 months before using.


Place one disk of dough between two sheets of parchment paper and roll until 1/8 inch thick. If dough cracks it is too cold and needs to warm up a bit (although my dough continued to crack even after it was room temperature). If the parchment paper wrinkles while rolling it out, make sure to smooth out the wrinkles before continuing to roll it out. 

Use cookie cutters to cut the dough into desired shapes and transfer to a parchment lined cookie sheet, spacing the cookies 1 1/2 inches apart from one another. Scrapes of dough can be gently kneaded and re-rolled until all the dough is used. Be careful though because the more you work the dough the tougher the cookies will be. 


Preheat oven to 375 degrees F and place oven rack in the center. Before putting cookies in oven sprinkle them with the remaining sugar (if desired). Bake one pan at a time, rotating the sheet halfway through cooking. Cook anywhere from 8-13 minutes, or until light golden brown. 


Transfer to wire cooling rack and cool completely. Decorate as desired.

There is no extra sugar on top of these cookies.
Cookies can be stored in an airtight container at room temperature for up to one week.